|
|
Linux Backup Script(s)using 'rsync'
sample code for
|
|
! Note !
A newer web page (circa 2019-plus) on
rsync-backup scripts is available.
See the scripts on that page.
Sections Below:
INTRO
RSYNC-SCRIPT(2010apr)
RSYNC-SCRIPT(2010dec)
CLEANUP-SCRIPT(2010oct)
CLEANUP-SCRIPT(2012sep)
BACKUP-DRIVE-PREP(2010oct)
BACKUP-DRIVE-RECOVERY(2010dec)
INFO-SEARCHES
BOTTOM-of-PAGE
|
INTRODUCTION : Around 2010, I migrated my files (email, web browser bookmarks, documents, photos, etc.) from a Microsoft Windows personal computer to a home-built computer using Linux (Ubuntu 9.10, 'Karmic Koala'). Around that time, I happened to read about using the Linux 'rsync' command to backup files.
(Reference: That 'Answer' showed that the form of the 'rsync' command for backing up files was rather simple: rsync --archive --delete /path/to/source/ /path/to/dest/ For my applicaton, the 'source' directory is my home directory --- and the 'destination' directory is a directory on an external USB storage drive. NOTE: You need the slash at the end of the source and destination directory names if they already exist. If you leave off the slash, rsync tries to make a new sub-directory with that last sub-directory name. In my case, I could simply use /home/ as the entire 'source' directory name --- which would backup my home directory and any other home directory under the '/home' directory. And (in the Ubuntu operating system), I could use for the 'destination' directory a name like /media/VolumeName/home/ or /media/userid/VolumeName/home/ The '--delete' option removes files not present under the 'source' directory --- that is, it removes files from the 'destination' directory that are no longer in the 'source' directory. The '--archive' option causes all file permissions and timestamps to be copied. See the comments (below), in the backup script(s), for a more detailed description of the 'rsync' parameters being used --- such as '--archive' and '--delete'. If you start with an empty 'destination' directory (say, on an external USB storage drive), the first run of the 'rsync' command would copy ALL the files from 'source' to 'destination'. In subsequent runs, this form of the 'rsync' command copies only files that are different. With large files that have changed, it only copies the parts that have been altered. So this form of the 'rsync' command is said to do 'incremental backups' --- copying only new files and files that have been changed, to the 'destination' directory --- and deleting files from the 'destination' directory that have been removed from the 'source' directory. I devised the following 'rsync' scripts, for my main desktop computer and for some netbook computers, based the 'rsync' info summarized above. When to run the scripts: When I am doing a lot of web-page or shell-script or Tcl/Tk-script development (almost daily), I may run the 'rsync' script almost daily --- to back up the file changes and new files in my home directory to an external USB disk drive. Otherwise, if I have changed only a few non-critical files, I may run the 'rsync' script after a week or two. But BEFORE each 'rsync' run, I run a 'file cleanup' script, in order to get rid of an accumulation of un-needed 'thumbnail' files and web browser files, such as 'Crash reports' and 'minidumps'. A case when I really needed the backups: In October 2010, when I fried my video board (and, as I later found out, my CPU) on my main desktop computer when investigating a noisy fan, my 'rsync' backup really saved me. A short rant on the fried-board: Lousy EVGA Nvidia 7600GS board! Googling revealed that many others have had problems with a noisy fan on this board --- sometimes only a few months after installing the board. Many reported burst capacitors on this board --- and the board kept running, until one too many capacitors blew. My board lasted for about 3 years --- progressively noisier for about the last year of those three. It appears that the screws holding a fan onto the board were working their way loose, and the fan was touching the screws. The noise got so bad I could not ignore it anymore. I tried to access the screws to tighten them but could not. Somewhere in the process, it appears that one-too-many capacitors blew. I am a fan of fanless video boards now --- pun intended. I do not need a fan-equipped, high-end video board, since I am not a video game fan --- pun intended. I was able to restore about 45 Gig of backed up data to some of my other computers --- which I used until my desktop CPU and video were replaced/repaired. I only wish I had backed up more frequently. After that incident, I made a backup rsync-script an icon on my desktop and I run the script just before I logoff --- especially after login sessions in which I change some of the files in my web site directories and software development directories.
Having the backup script as an icon on my desktop --- near a logoff icon --- makes it very easy for me to remember to 'kick off' the backup script. (I also run a file-cleanup script before running the 'rsync' script. The 'fileCleanup' script is described below.) How the scripts are presented, below: The scripts are presented in two ways below:
You can see the comments, in the backup scripts below, for some details of the parameters being used in the 'rsync' and 'rm' and 'read' commands being used in the scripts. And you can see the exact way that the directories are being specified in those commands. The 'read' command is used here to pause the execution of a script. If you want to download any of these scripts for use, you can right-click on the '.txt' file link and choose an option such as 'Save Link Target As ...' in the popup menu that appears from your web browser. After downloading one of these scripts, you can remove the '.txt' suffix from the file name and leave the '.sh' suffix. Remember to change the permissions on the file to make the file 'executable'. You can use a command like 'chown 755 filename' or, in a GUI file-manager like MATE-Caja, you can right-click on the filename and choose the 'Properties' option from the menu that pops up. Then open the 'Permissions' panel and click the checkbutton titled 'Allow executing file as program'. |
|
LINK TO SCRIPT
00_rsync_bkup_2maxtor.sh.txt |
|
Alternate display of the old 2010-Apr rsync script:
|
|
UPDATE: This new version allows for starting up 'rsync' from a desktop icon. This version starts up 'rsync' in a terminal window --- using the 'gnome-terminal' command --- so that backup messages can be seen in the terminal. This helps assure that the proper (recently changed) files are being backed up, and one can see when the backup is finished (when the messages stop and a summary is shown). This script uses a little 'start_sh_after_exe.sh' script whose code is shown below this 2010-Dec rsync script. For command-syntax details, see comments and code in this rsync script.
LINK TO SCRIPT
00_rsync_bkup_2maxtor.sh.txt |
|
|
|
Below is the 'start_sh_after_exe.sh' script code, which is used to hold the terminal window open after 'rsync' runs. |
#!/bin/sh
set -x
$@
set -
/bin/bash
|
I found a forum thread on the internet where someone said they use this technique to cause the 'gnome-terminal' to stay open after executing the command string. (In fact, not only does it stay open, but it can accept additional commands at the command prompt.) (I added the 'set -x' and 'set -' commands --- to show the command string being executed --- the '$@'.) |
|
FILE CLEANUP BEFORE BACKUP : After doing several backups just before logoff (via the 'backup_2maxtor' desktop icon shown above), I saw, in the messages from 'rsync', that 'rsync' was repeatedly backing up files from browser 'cache' directories --- and thumbnail image files from a $HOME/.thumbnails directory. This was a waste. I did not need these files/subdirectories backed up. (I have not traced the source of all of the thumbnail files. I have set my Nautilus preferences to NOT show thumbnail icons of image files. However, Nautilus seems to continue making thumbnails, in some cases. The Gnome2 'SaveAs...' dialog, which includes a GUI directories-and-files navigator, seems to be making some of the thumbnail files. It also appears that some image programs, such as the 'Eye of Gnome' ('eog') image viewer program, makes some of the thumbnail files.) I devised the following 'files-cleanup' script to show me the removal of files from such directories.
LINK TO SCRIPT
00_fileCleanup.sh.txt
|
|
Alternative display of the file-cleanup script:
|
|
UPDATE - 2012 Sep Version of 'file-cleanup' script: This version uses just one terminal window, instead of one terminal for each of several directories to be cleaned. Since the '-e' option of this terminal command is not friendly to a lot of separate commands, the terminal-startup command calls on a separate script, named '00_fileCleanup_ver2_RunInTerminal.sh', below, to do the file cleanup. For command-syntax details, see the comments and code in the following two scripts.
LINK TO SCRIPT
00_fileCleanup_ver2.sh.txt
|
|
Alternative display of the file-cleanup 'wrapper' script:
|
|
LINK TO SCRIPT
00_fileCleanup_ver2_RunInTerminal.sh.txt
|
|
Alternative display of the file-cleanup 'core' script:
|
|
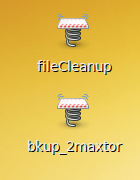
Of course, if I find that I do not need to clean one of these directories, I can comment-out that cleanup code. And I could add other directories to cleanup. I hardly ever use Firefox (I use Seamonkey instead), so in a perfect world I would not need to clean out the Firefox cache directories. But there are some applications which startup Firefox (to show help files or whatever), so I keep the Firefox cache directory cleanup code even though it usually finds nothing to delete. You might want to tell me that one can clean the Firefox cache directory by setting cache-cleanup-at-exit in Firefox preferences. But I find that the Firefox (and Seamonkey) cleanup is not always complete. The reason for the two Seamonkey directories: I never know when a version of Seamonkey is going to use the $HOME/.seamonkey directory or the $HOME/.mozilla/.seamonkey directory. There has been some confusion in use of these directories in a previous Seamonkey 1.x release. (The $HOME/.seamonkey directory does not seem to be used by Seamonkey2.) To help remind myself to run the file cleanup script before running the rsync backup script (via the desktop icon), I added an icon to the desktop (above the rsync backup icon) to remind myself to do the file cleanup before the backup. Picture follows.
Sometimes I run the 'file-cleanup' script without running the 'backup' script, just before logging off. Hence I keep the two scripts separate, rather than combining them into one 'monolithic' script. |
|
PREPARING AN EXTERNAL BACKUP DRIVE : As the backup directory name (/media/Maxtor160GB) in the rsync script above indicates, the backup drive on that computer (a home-assembled PC) was an external Maxtor 160 Gigabyte drive. In October 2010, I prepared a 1 Terabyte Seagate Freeagent external drive for use as a backup drive --- to be used with an 'rsync' script on another desktop computer of mine --- a Cyberpower PC that I bought in 2005 from cyberpowerpc.com. After frying the video board on my main desktop computer, I installed Ubuntu 9.10 on the Cyberpower computer in October 2010 --- overlaying an old Xandros Linux installation, as I described in a web page on installing Ubuntu 9.10 over Xandros Linux, while preserving a dual-boot of MS Windows --- and creating a separate partition for the home directory. I took this opportunity to take notes on how I prepared this Seagate drive as a backup drive for a Linux system. A description of the drive preparation process, for this 1 Terabyte Seagate drive, follows.
|
gnome-terminal -e \
   rsync --archive --delete -vv --modify-window=1 \
   /home/blaze/ \
   /media/SEAGATEfreeagent/CyberpowerPC/home/blaze/
Actually, the 'gnome-terminal -e' command in step 5 above is a simplification of what I actually use. I would like the gnome-terminal to stay open after the rsync command executes, so that I can examine the list of files being archived. But 'gnome-terminal' does not support a '-hold' option like 'xterm' does. I could use 'xterm -hold -bg black -fg white -e'. But, since I prefer the scroll bar of 'gnome-terminal', I use the following command instead. |
gnome-terminal -e "$HOME/Rsync/start_sh_after_exe.sh \
   rsync --archive --delete -v --modify-window=1 \
   /home/blaze/ \
   /media/SEAGATEfreeagent/CyberpowerPC/home/blaze/"
|
where the script 'start_sh_after_exe.sh' contains code shown in an rsync-script section above.
LINK TO SCRIPT
00_rsync_bkup_2freeagentSeagate.sh.txt This script uses the 'start_sh_after_exe.sh' script, which is shown in a section above. |
|
Alternative display of the rsync-to-Seagate-drive script:
|
|
RECOVERY FROM A 'BOTCHED' After setting up external backup disks for a couple of desktop computers, I decided to set up an external backup disk for an Acer netbook computer on which I installed Ubuntu Linux 9.04 in mid 2009, as described on my Ubuntu Installs web page. I bought a Segate Goflex 320BG portable hard drive at BestBuy. I connected the drive to a USB port of my netbook and it was automatically recognized by the Ubuntu Linux installation on my netbook. A drive icon appeared on the desktop. I right-click opened the drive to check the contents. There are about half a Gig of files on most Seagate drives --- mostly Microsoft Windows executables, which I did not need on my Acer netbook on which I had installed Ubuntu Linux 9.04 over the MS Windows OS that came on the netbook. (By the way, those articles that keep appearing that say Linux is dead on netbooks --- I strongly disagree. I am not the only one who buys a netbook with Microsoft Windows on it and overlays that MS installation with a Linux install. I have several Acer netbooks on which I overlaid MS Windows installations with Ubuntu Linux installations.) I moved the Seagate files into a new home subdirectory, just in case there were a file (like a documentation file) that I might need later. The drive label was a rather generic name like 'Seagate', but I like to use a more descriptive label, like 'SeagateGoflex320GB' that shows the capacity of the drive. So I 'right-clicked' on the drive icon and clicked on the 'Properties' line in the menu that popped up. I was concerned that the Format option was grayed out. I did not know how I would format the drive from NTFS to a Linux format. But I proceeded to try to change the label. I entered a new name for the drive in a blank entry field that showed up. I unmounted the drive and then tried reconnecting it. WHOOPS! I got the following error in a popup window:
Cannot mount volume. Apparently the Hal (Hardware Abstraction Layer) daemon did not like what Nautilus (the Gnome2 file manager) and I did to the drive. I had a mild panic attack. It seemed that I had made a paper-weight out of this new disk drive. I Googled keywords like 'usb external hard drive ubuntu'. On an Ubuntu help page on USB mounts, I found a hint: Use 'sudo fsdisk -l' to show the disks. With this command (in a terminal window on my Acer netbook), I saw that /dev/sdb1 was recognized as being a 320GB drive --- in addition to /dev/sda, the 160GB internal drive. The fact that the drive could be detected gave me hope that this mount problem could be overcome. I saw a web page that suggested using Gparted to fix the label. I used the Ubuntu Software Center to install Gparted on the Acer netbook. Then I used Gparted (which recognized the existence of the /dev/sdb1 device) to reformat the NTFS-formatted external drive to ext3. I set the volume label to 'SeagateGoflex320'. (I entered 'SeagateGoflex320GB' but, apparently, only the first 16 characters were used.) Then I was able to mount the external drive by unplugging the USB connection and reconnecting. I felt much relieved at this point. I could use the drive for something other than a paper-weight. I then used the sample scripts above to setup a 'fileCleanup' icon and a 'bkup_2Seagate320GB' icon on my desktop, just below the LogOff/Shutdown button on the right of the Gnome2 'top-panel'. Now, before I click on the button for the options LockScreen/Suspend/Hibernate/Restart/Shutdown --- to shutdown the netbook --- if I have edited some files in my home directory, I click on the 'fileCleanup' icon to cleanup files before the backup. Then I connect the backup drive and I use the 'bkup' icon to rsync-backup my files. Works like a charm --- after that initial mount-problem scare. Thank you Google developers, Ubuntu developers and users, fdisk developers, and Gparted developers. In addition to being thankful for my family, I felt I had to add these thank-you's in the 2010 Thanksgiving season in which this near-fiasco occurred. |
|
FOR MORE INFORMATION: To find more information on using 'rsync' for backups (and for info on related file backup topics), you can try WEB SEARCHES on keywords such as the following. 'incremental file backup linux ubuntu' 'external usb drive file backup linux ubuntu' 'external usb drive format ext3 ext4 for file backup on linux ubuntu' You can also try Wikipedia pages like the following, and following links on those pages for even more information. Wikipedia page - 'File synchronization' Wikipedia page - 'Comparison of file synchronization software' Wikipedia page - 'Incremental backup' Wikipedia page - 'Backup rotation scheme' Wikipedia page - 'Differential backup' Wikipedia page - 'List of backup software' Wikipedia page - 'Comparison of backup software' Wikipedia page - 'Hard_disk_drive#Market_segments' Wikipedia page - 'USB mass storage device class' |
|
Bottom of this To return to a previously visited web page location, click on the Back button of your web browser a sufficient number of times. OR, use the History-list option of your web browser. OR ...
< Go to Top of Page, above. >Page history:
Page was created 2010 Oct 14.
|